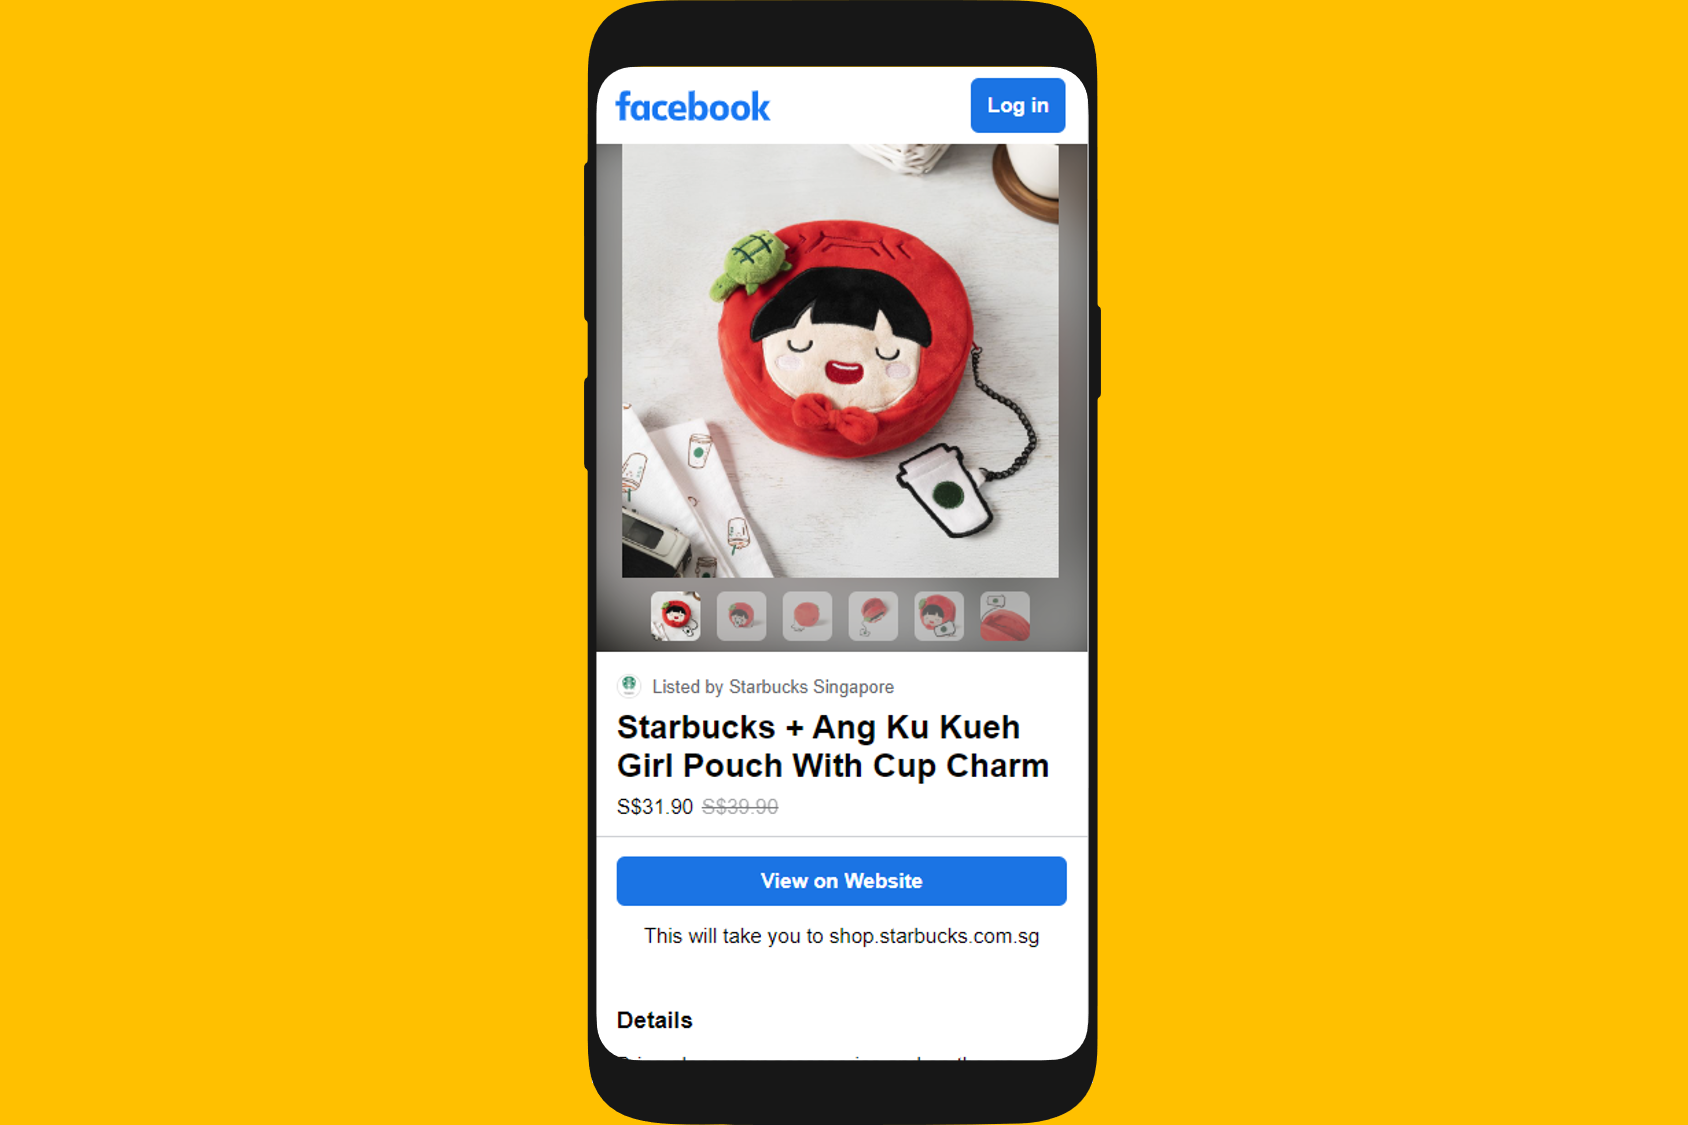
In May 2020, Meta launched Facebook Shops in an effort to help small businesses strengthen their digital presence by making it easier to sell online. This made it possible for Facebook users to browse, shop and buy products on the social media platform.
If you run a business, there’s a good chance you already manage your own Facebook page. Selling on Facebook can help you get more revenue out of your social media efforts and take advantage of the community you’ve built.
In this Facebook guide, we’ll show you how to start selling on Facebook with an easy step-by-step tutorial.
Requirements to Sell On Facebook
Before you can start selling on Facebook, your Facebook account and page must meet Meta’s commerce eligibility requirements.
The requirements are:
- Your Facebook account and page must comply with Facebook’s Terms of Service, Commercial Terms and Community Standards.
- Your Facebook account and page must represent your business and domain.
- Your business must be located in a supported market for Facebook commerce.
- Your Facebook account and page must have demonstrated trustworthiness with an authentic, established presence.
- You must provide accurate product information and follow e-commerce best practices like having a proper refund and return policy in place.
At the time of writing, Facebook Shop is currently only available to businesses that sell physical goods, e.g. kids bed. If everything checks out and your business is eligible to set up shop, great! Let’s proceed with the Facebook tutorial.
How to Set Up a Facebook Shop
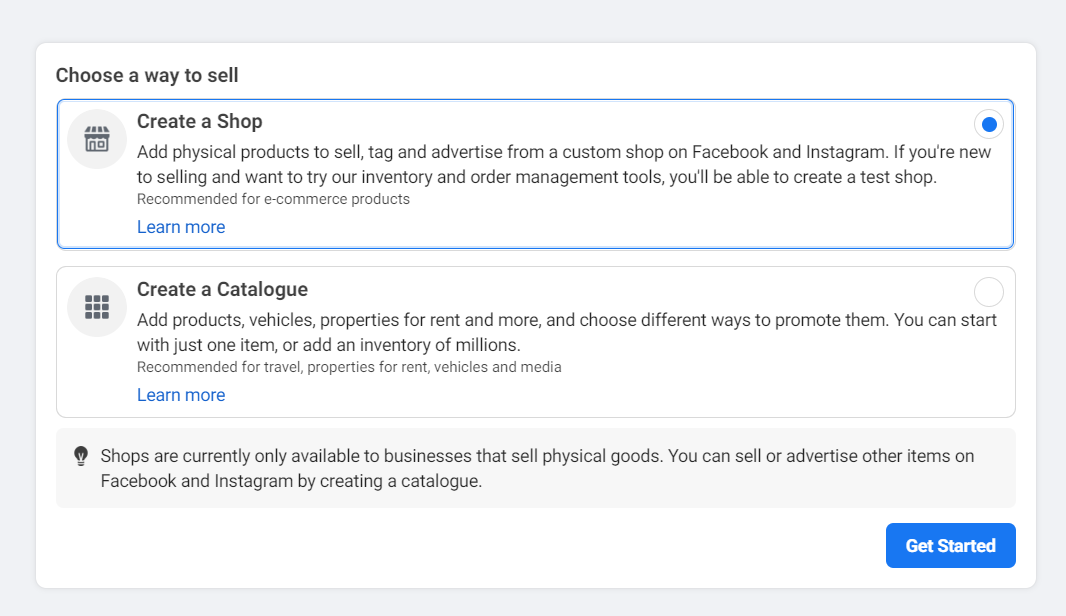
Step 1: Go to Meta Commerce Manager and click Create a Shop
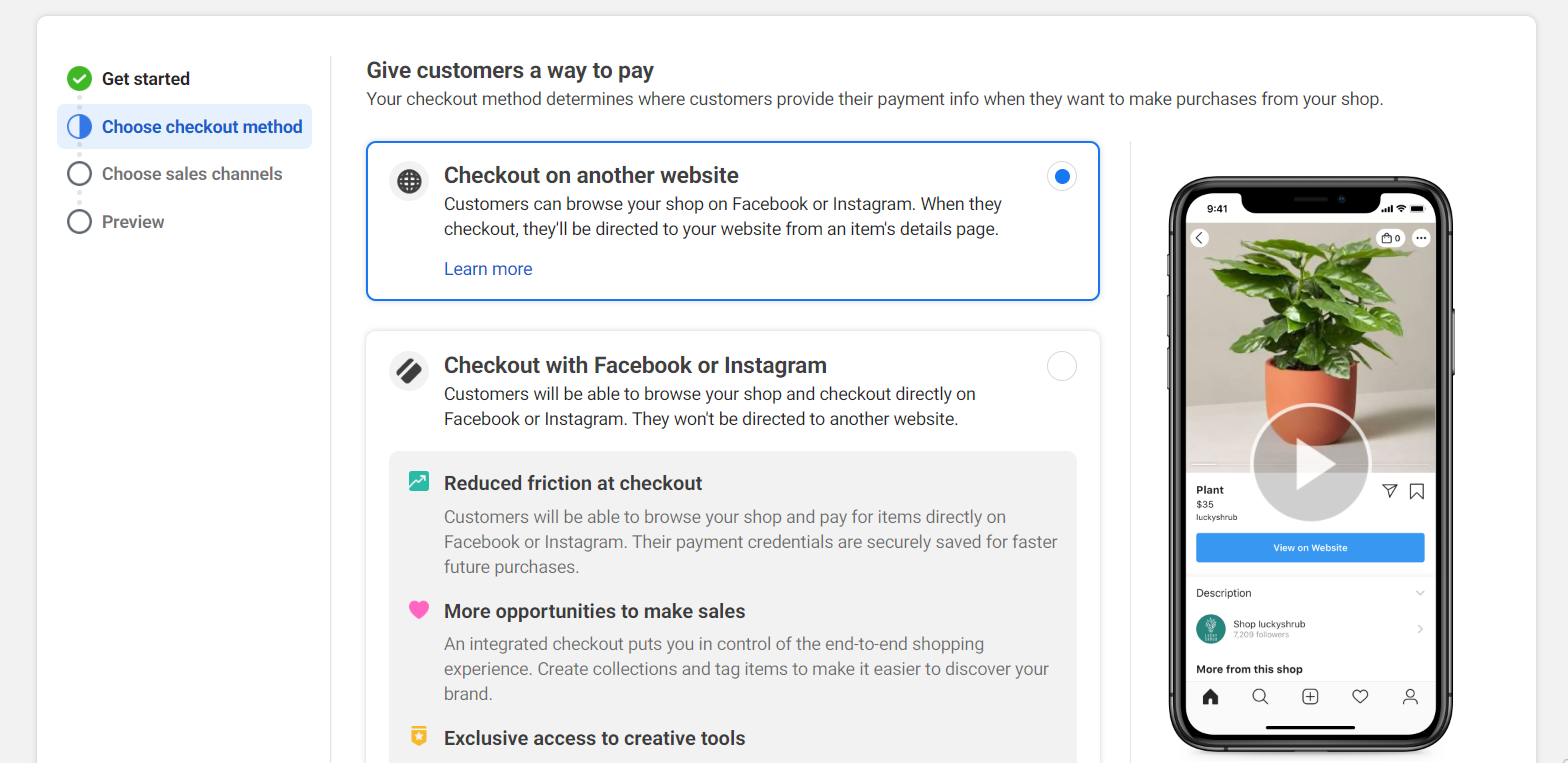
Step 2: Choose your Checkout Method
This option determines what happens when your customer clicks checkout after shopping on your page.
2a. Selecting Checkout on another website will direct your customers to your website/online store.
2b. Selecting Checkout with messaging will start a Facebook Messenger or WhatsApp conversation.
At the time of writing this article, the option to Checkout with Facebook or Instagram is only available to businesses within the US.
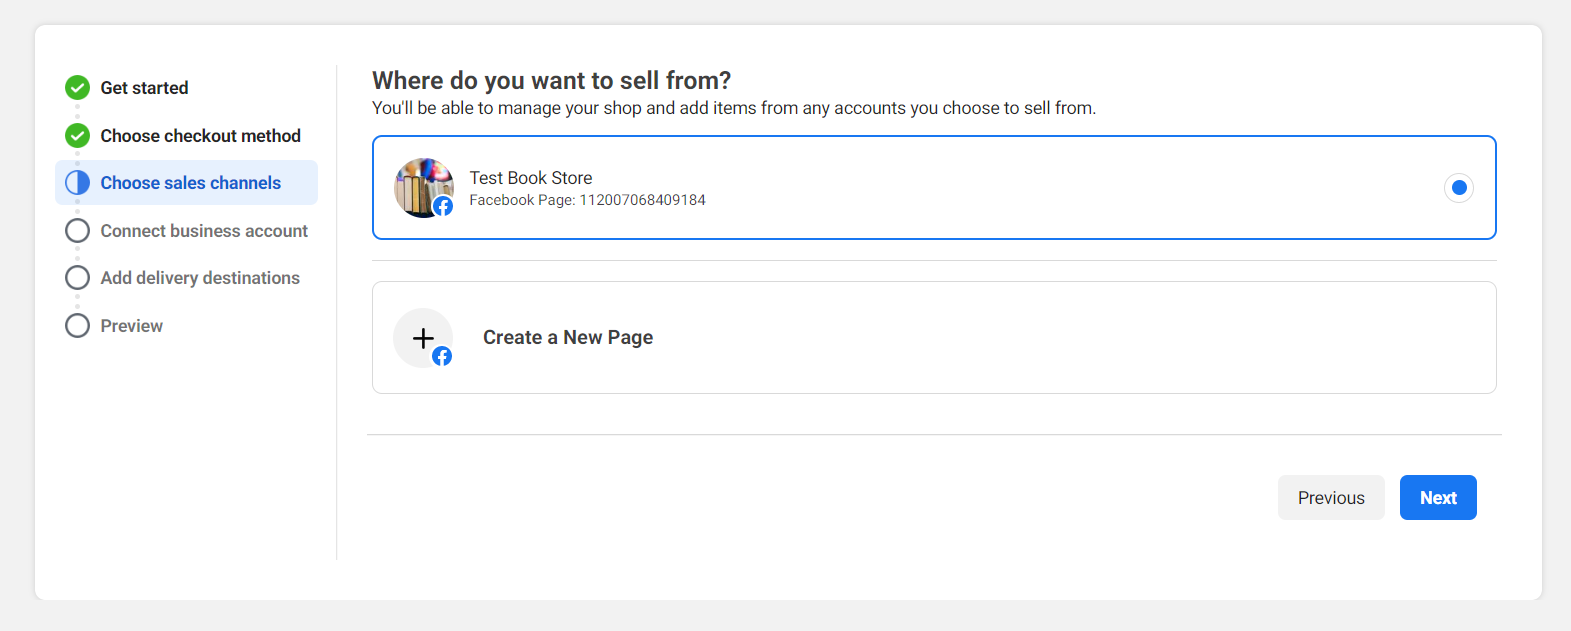
Step 3: Choose your Sales Channels or Create a New Page
Step 4: Connect Your Facebook Business Account
If you do not have an existing Facebook Business Account, you’ll be prompted to create one.
Step 5: Add your Delivery Destinations
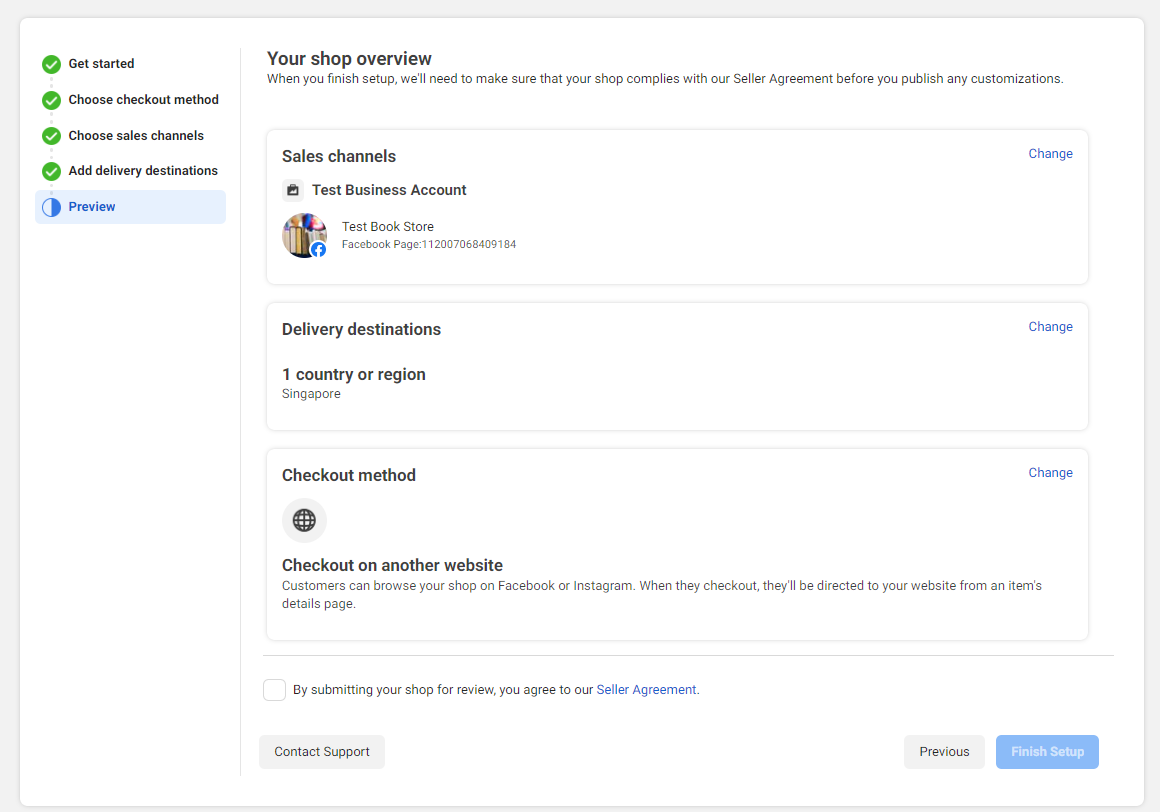
Step 6: Review your Shop Overview
Here you can ensure all the options you’ve selected are correct and make any last minute changes before you finalise your setup.
Once you’re ready, tick the Seller Agreement checkbox and Finish Setup.
After setup is complete, you’ll be taken to the e-commerce dashboard.
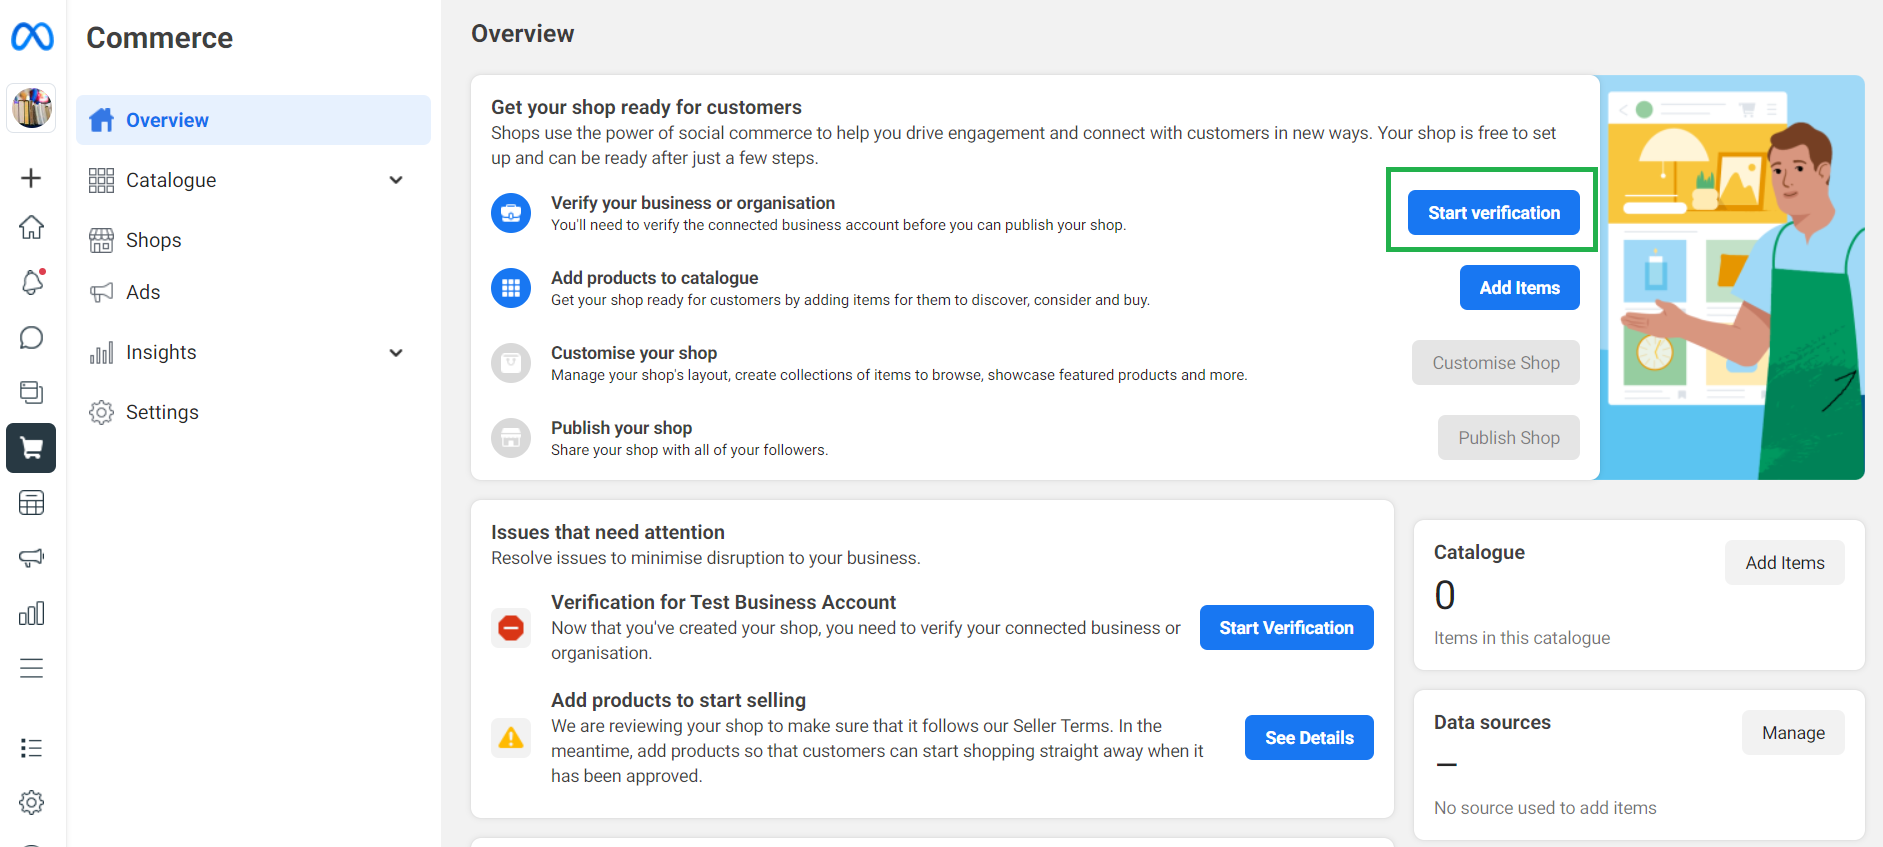
Step 7: Verify your business
You will be asked to verify your account with your organisation details or identity documents. Select one and follow the steps outlined by Facebook.
If your business is already verified on Facebook, proceed to Step 8.
Step 8: Add products to Catalogue
8a. From your e-commerce dashboard, click on Add Items.
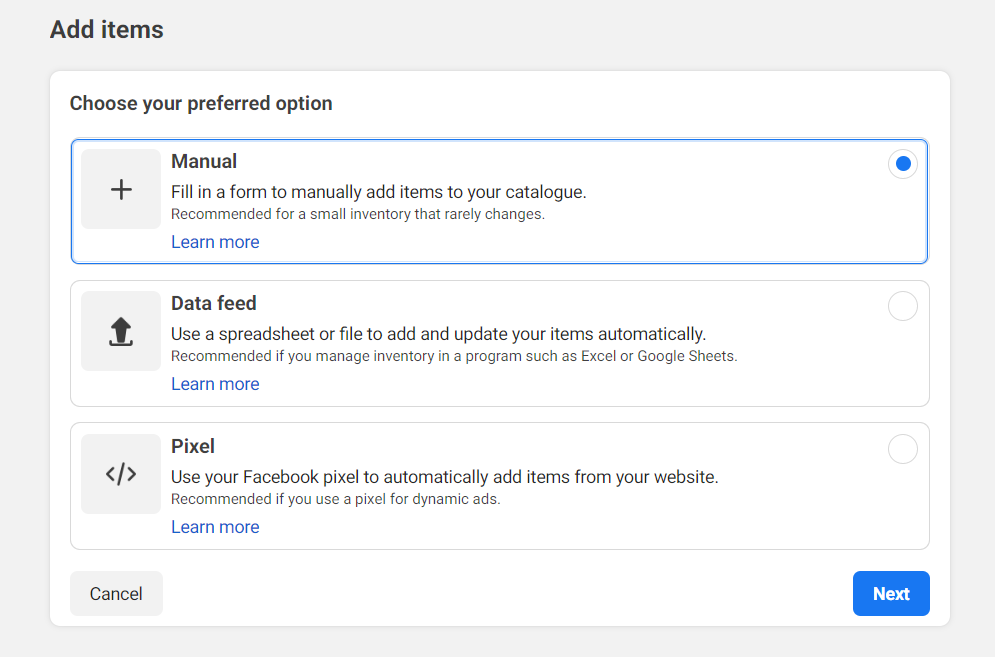
You will be presented with 3 options.
The best method for you depends on factors like how many items you have, the type of items you sell and how frequently your item information changes. Facebook provides a comparison table in their Business Help Centre which you can also find below.
| Manual | Data Feed | Pixel | |
| Inventory size | Small and doesn’t change often | Medium to large or changes often | Medium to large or changes often |
| Inventory type | All inventory types except property listings | All inventory types | Products only |
| What you need | Item details and images | Data feed file with correct specifications
File hosting site (optional) |
Pixel installed
Microdata tags on product pages Recent website activity |
| Effort to set up | Low | Medium | High |
| Effort to manage | High: Update items manually | Medium: Update data feed file as needed | Low: Pixel updates products automatically |
| Recommended if | Your inventory is small and doesn’t change often | Your inventory is large or changes often
You want to set up scheduled uploads hourly, daily or weekly |
Your inventory is large or changes often
You already have a pixel installed |
Note: If you use Shopify to run your e-commerce store, you can add Facebook as a sales channel to sync products across both platforms so you don’t have to manually upload each item.
This Facebook guide will cover adding items using the Manual option.
8b. Select the Manual option
8c. Input your item information
8d. Click Finish
Step 9: Customise your shop
After adding items, it’s time to customise your Facebook Shop. To customise your shop:
- Head to Meta Commerce Manager
- Click Shops on the left navigation bar
- Click Edit Shop
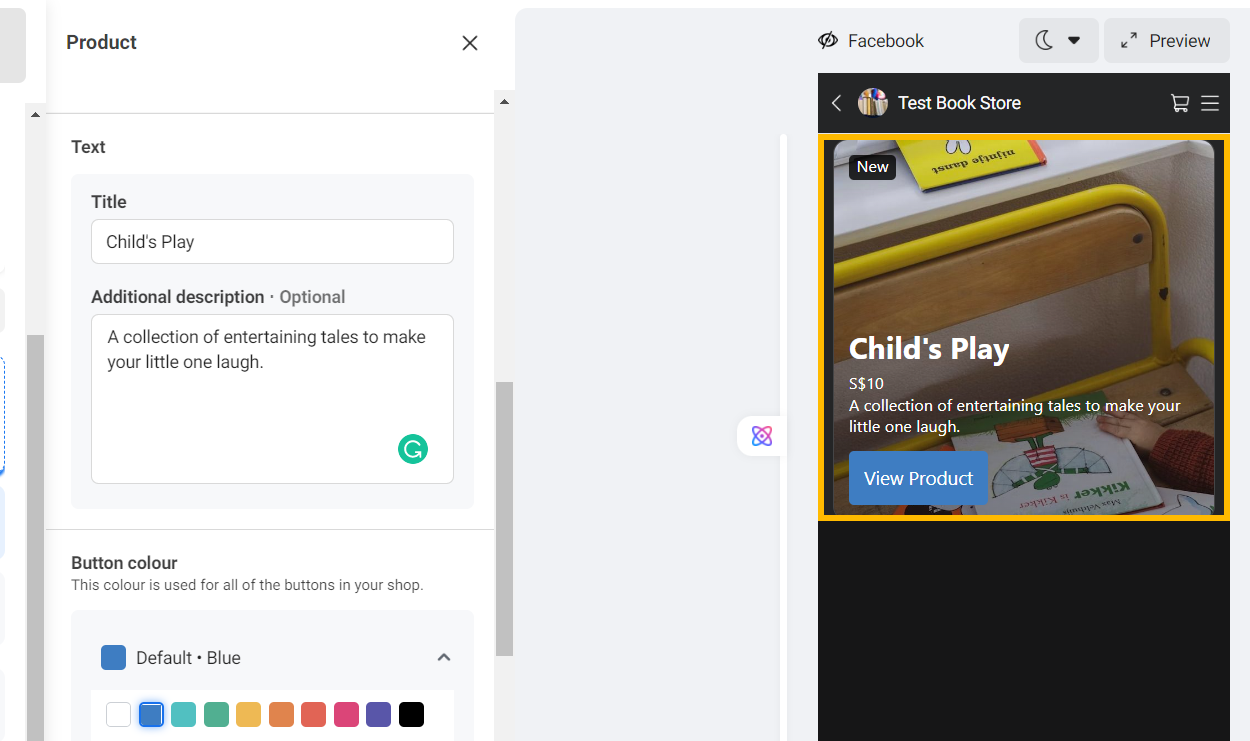
Here, you can customise the look and feel of your Shop’s home page by choosing which products to feature, editing the text, button colours and more.
Take this time to ensure your shop accurately represents your brand with the right colours and style!
Step 10: Publish your shop
When you’re happy with everything, simply click Publish Shop on your Meta Commerce Dashboard. Once Facebook has reviewed and approved your shop, it will go live and you can start selling on Facebook!
Set Up a Facebook Shop: Summary
- Create a shop in Meta Commerce Manager.
- Choose your checkout method.
- Select your sales channels.
- Connect your Facebook business account.
- Add your delivery destinations.
- Finalise your shop overview.
- Verify your business.
- Add products to catalogue.
- Customise your shop’s homepage.
- Publish your shop.
Bonus: Learn How to Market Your Facebook Shop From Industry Professionals at FirstCom Academy
We hope that our step-by-step Facebook tutorial has been helpful in setting up your first Facebook shop. If you’ve just started selling on Facebook, you’ll eventually have to start marketing to take your shop to the next level and get more sales.
To accelerate your learning and get your Facebook Shop sales off the ground, why not consider learning in person from experienced industry professionals who can guide you and answer your questions as they come up?
FirstCom Academy’s How to Run Successful Facebook Ad Campaigns is a WSQ-certified and SkillsFuture Credit-eligible course that is ideal for complete beginners. Taught by expert digital marketers with real-world Facebook marketing experience, the course provides learners with an in-depth understanding of Facebook tools and includes hands-on practice on how to navigate the ads manager interface and set up successful campaigns.
Interested? Sign up for FirstCom Academy’s Facebook marketing course today!
Read also:
