Wix is the ideal platform for creating a beautiful, professional website without coding experience. Whether starting a blog, personal portfolio or a new business website, this step-by-step Wix setup tutorial will take you from an absolute beginner to a Wix wizard.
Wix is the ideal platform for creating a beautiful, professional website without coding experience. Whether starting a blog, personal portfolio or a new business website, this step-by-step guide will teach you how to set up and run your Wix website.
Wix offers hundreds of designer-made templates that are fully customizable and easy to use. After choosing your template, you can use the drag-and-drop editor to add and arrange elements such as text, images, and videos. You can also add extra features like social media buttons, contact forms, and online stores to enhance the functionality of your website.
By the end of this Wix guide, you’ll have a fully featured, functioning Wix website to call your own. Ready? Let’s get started!
Step 1: Create an Account
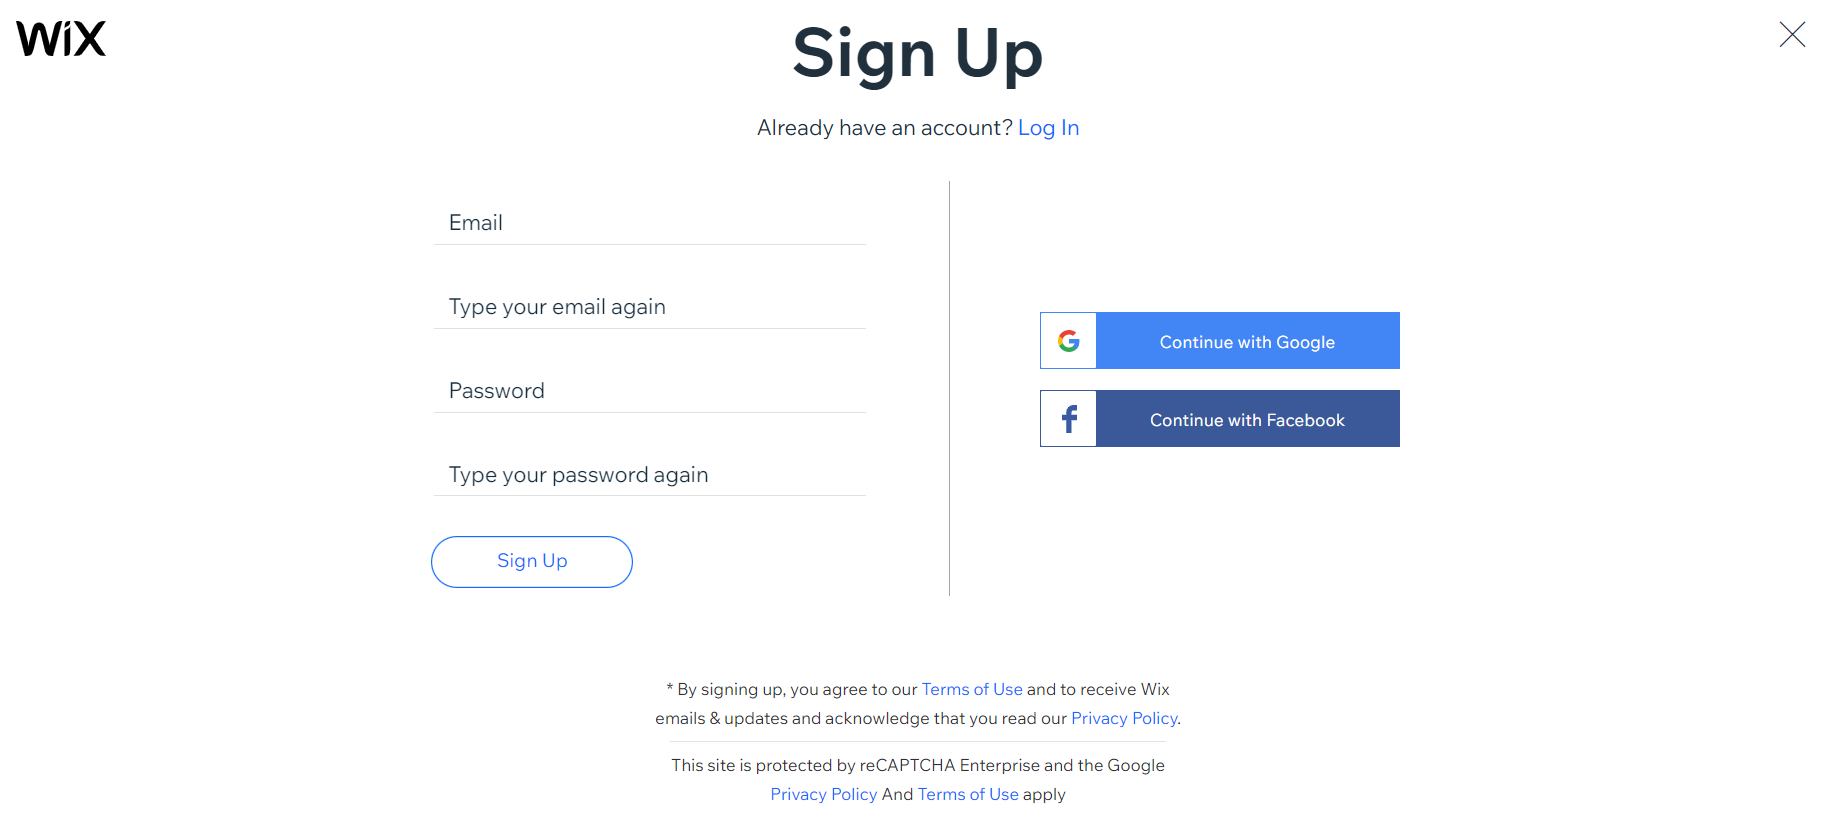
Before we begin, you’ll need to create a Wix account if you don’t already have one. On the Wix sign-up page, you can create a Wix account using your email or an existing Google or Facebook account.
Step 2: Choose Between Wix ADI or Wix Editor
Once you’ve created and logged into your Wix account for the first time, you’ll be prompted with a series of questions about the type of website you want to create, after which Wix will present you with recommendations based on your answer.
Wix ADI offers a simple but limited way to create a website using AI. The Wix Editor controls your website’s design but requires platform knowledge. For this Wix user guide focused on how to set up a Wix website, we’ll use the Wix Editor, which has more customization options.
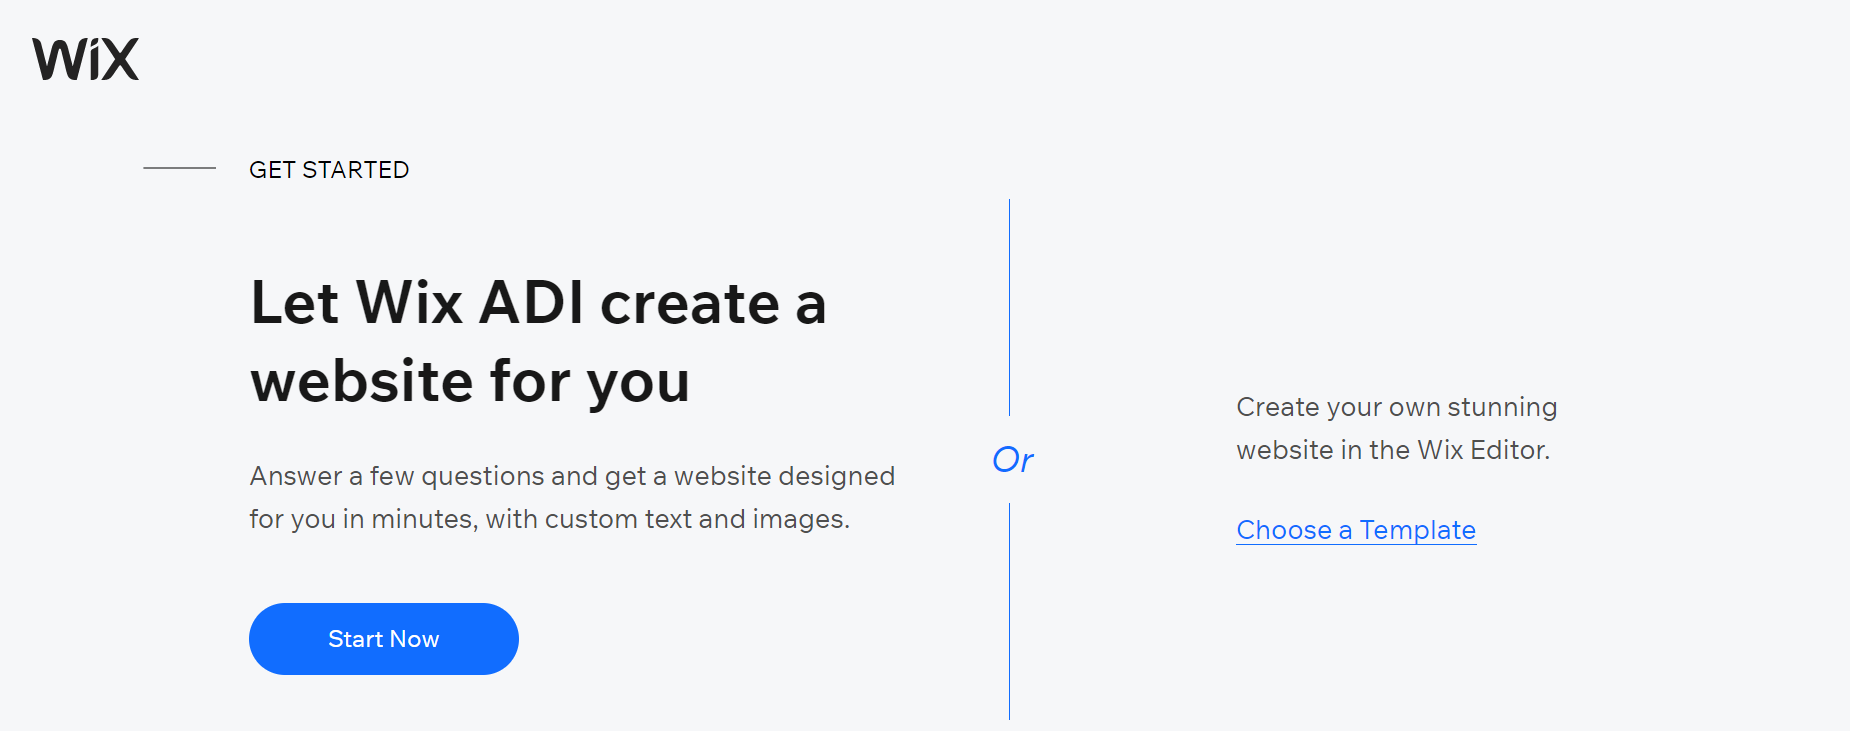
After going through the questionnaire, you’ll be asked if you’d like to let Wix ADI create a website for you or create your website with the Wix editor.
Wix ADI stands for Artificial Design Intelligence. Sounds fancy. It offers a simple but limited way to create a website by using artificial intelligence. Here’s a quick comparison between the two.
| Wix ADI | Wix Editor |
|
|
It should be noted that while you can convert a website made by Wix ADI into the Wix Editor, it doesn’t work the other way around. While creating a website using Wix ADI is quick and straightforward, it is more suitable for users with a small website with just 2 to 5 pages and aren’t fussy about their website’s design.
We’ll guide you through the Wix editor for this Wix setup tutorial, which has more options and customization features.
Step 3: Choose Your Website Template
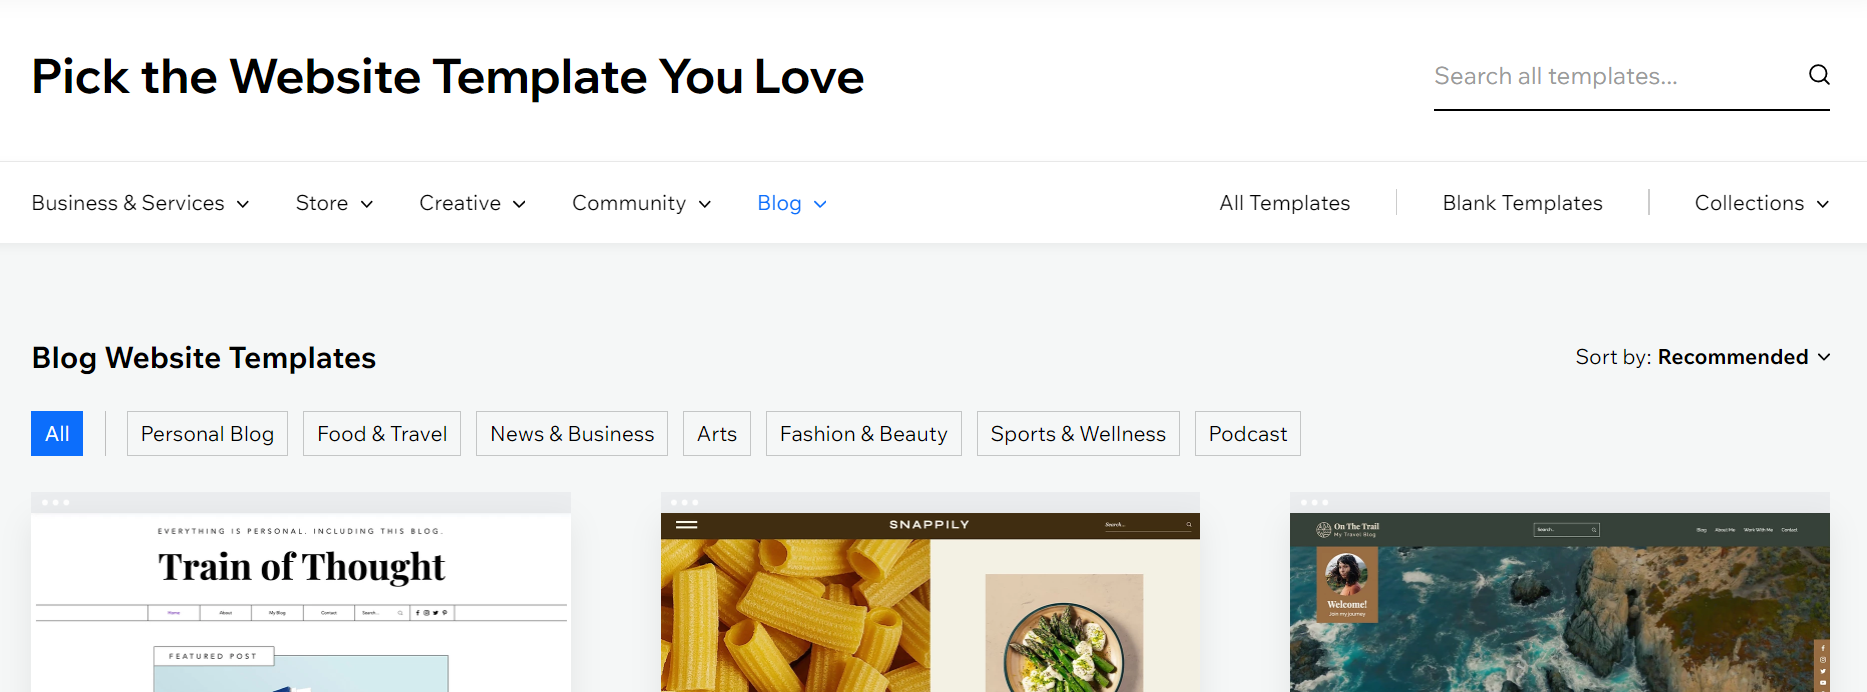
After you’ve selected Wix editor, you’ll be presented with some website templates based on the questionnaire you answered earlier. If the category Wix has chosen doesn’t match up with your business or the purpose of your website, you can browse templates from other categories using the navigation bar.
Wix has over 800 designer-made website templates, so take your time to go through any designs that catch your eye before making a decision.
To get an idea of how each template looks and functions, simply mouse over your desired template and click “View” — this will open a new tab in your browser with a demo website using the template you selected. From here, click around to explore the template.
Once you’ve decided on a template, click “Edit” or “Edit this site” to make changes. You can’t change your template after your website goes live, so make sure you’re set on your chosen template.
Step 4: Moving, Adding and Changing Text
Once you’ve chosen your website template, you’ll be taken to the Wix Editor to customize your website. If this is your first time exploring a drag-and-drop builder, don’t be alarmed! Everything has been made intuitive and easy to use, even to beginners.
In this part of the Wix guide, we’ll spend the following few sections taking you through some of the primary functions in the Wix Editor so you can start customizing your website.
Let’s start with the text.
Moving Text
To change where text is positioned on your website:
- Click on the text you wish to move, and wait for an orange box highlighting the text to appear
- Click on the space between the text and the orange box
- Your cursor should turn into four arrows; drag the text box to your desired position
Adding Text
To add new text to your template:
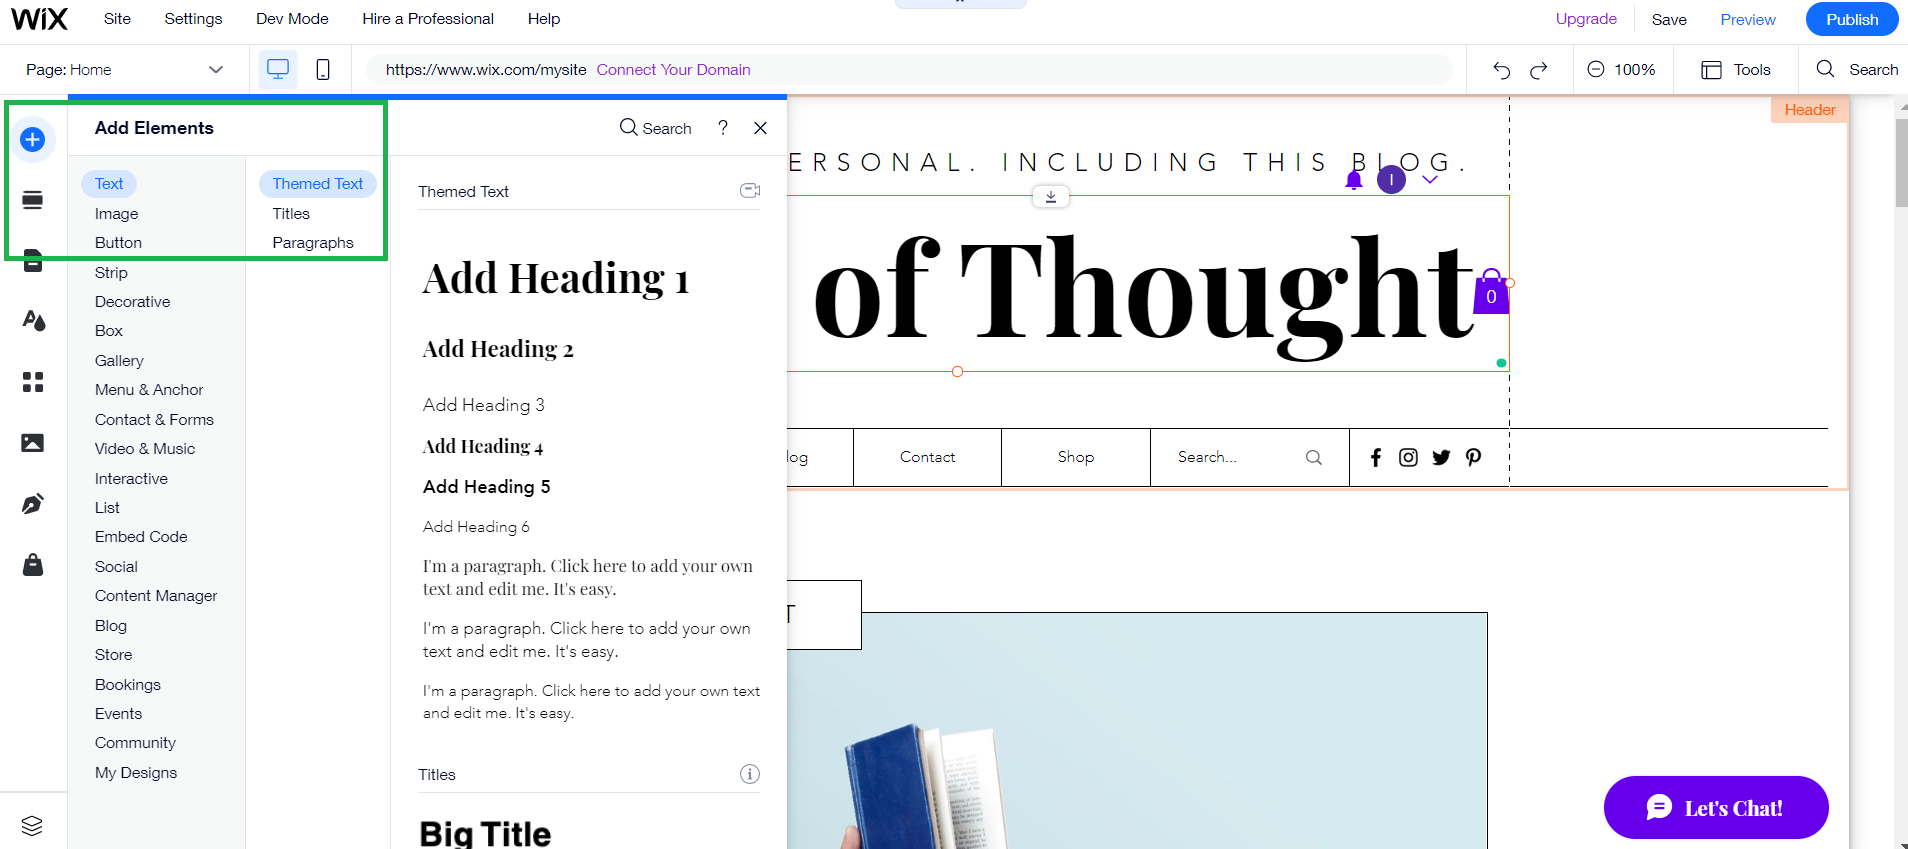
- Click on the + button on the top of the left navigation bar
- Select the first option, “Text.”
- Choose the type of text and design you want to add: “Themed Text”, “Titles”, or “Paragraphs.”
Changing Text
Changing the text in your template is straightforward enough.
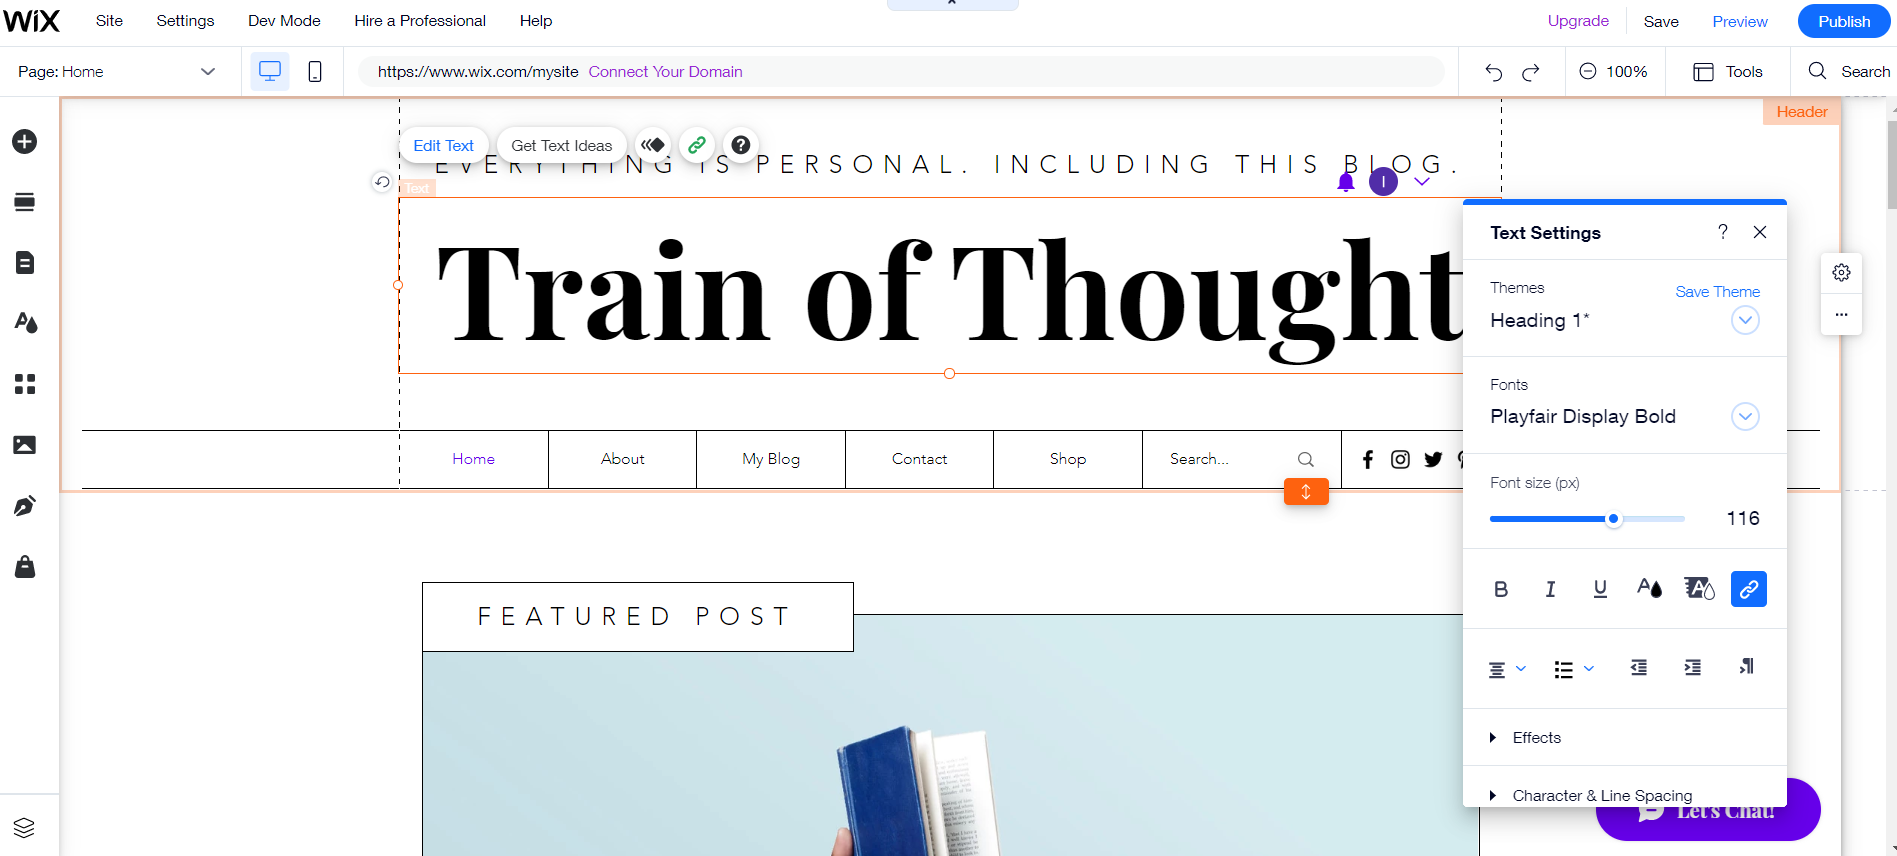
- Click on the text you wish to change, and wait for an orange box highlighting the text to appear.
- Select the text within the box to remove it, and type your new text
- Change text properties such as font, font size and effects in the “Text Settings” pop-up box
Step 5: Adding, Changing and Editing Images
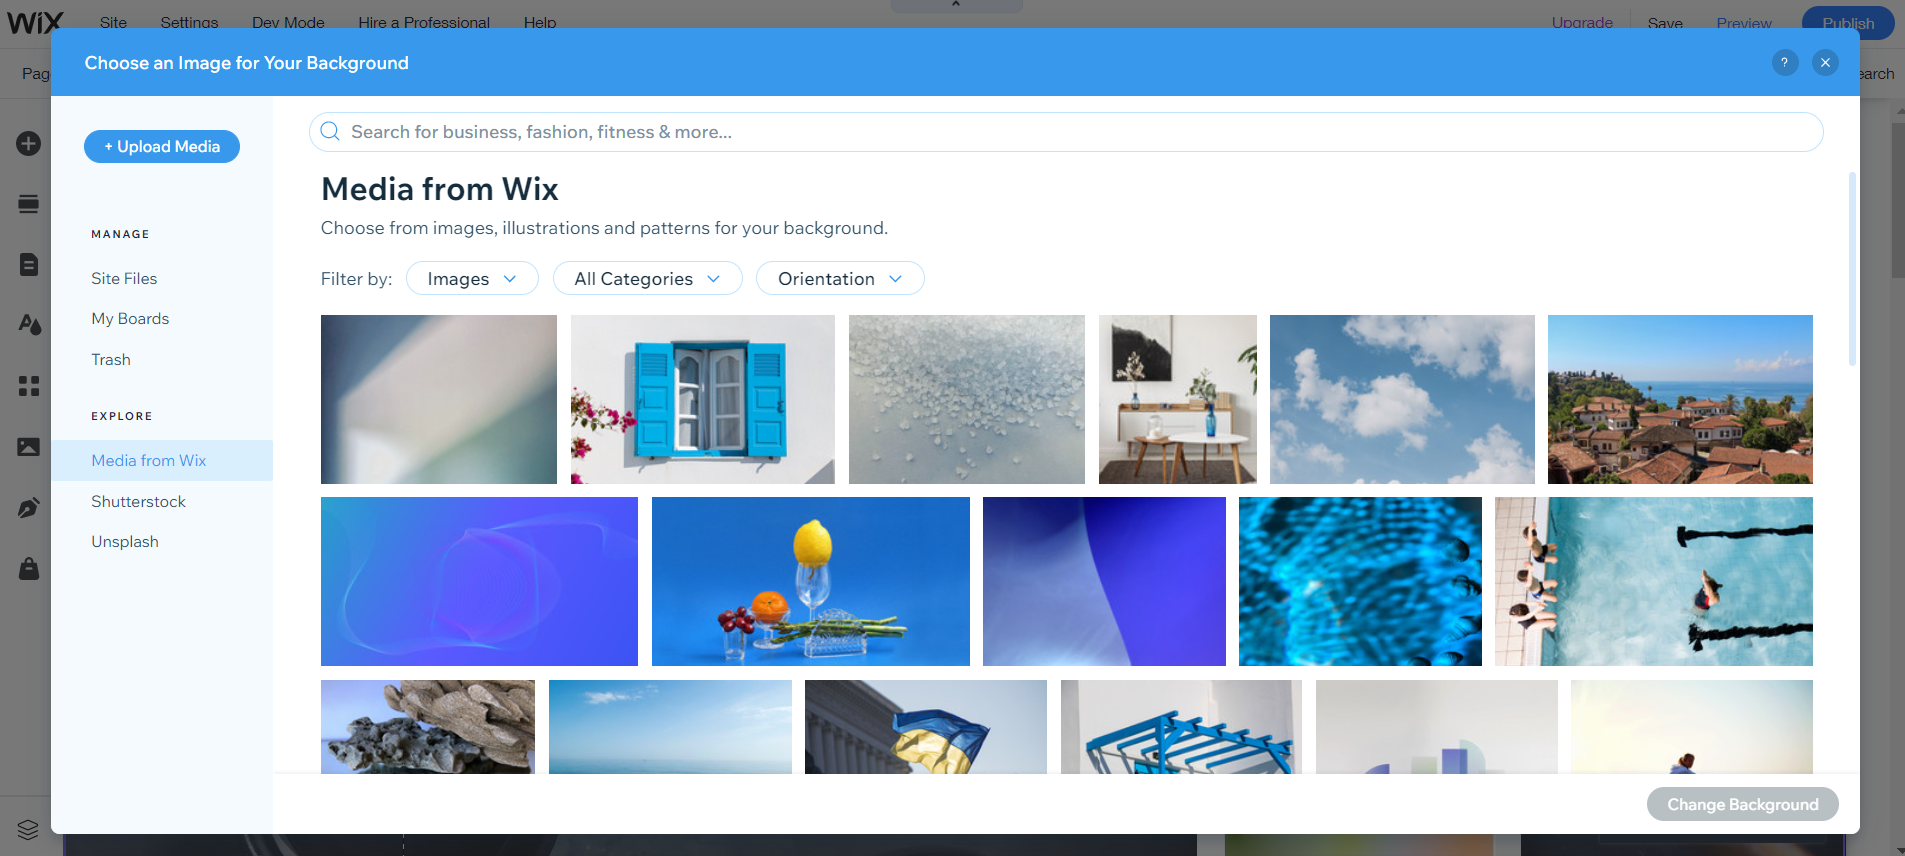
Adding and changing images in the Wix Editor is intuitive and straightforward, like text. The great thing about Wix is the option to upload photos or use one of the free illustrations or images from their library. There’s also an option to upload images from social pages like Facebook or Instagram.
If you still can’t find a suitable image for your website from those options, you can explore free stock image websites like Unsplash.
Adding an Image
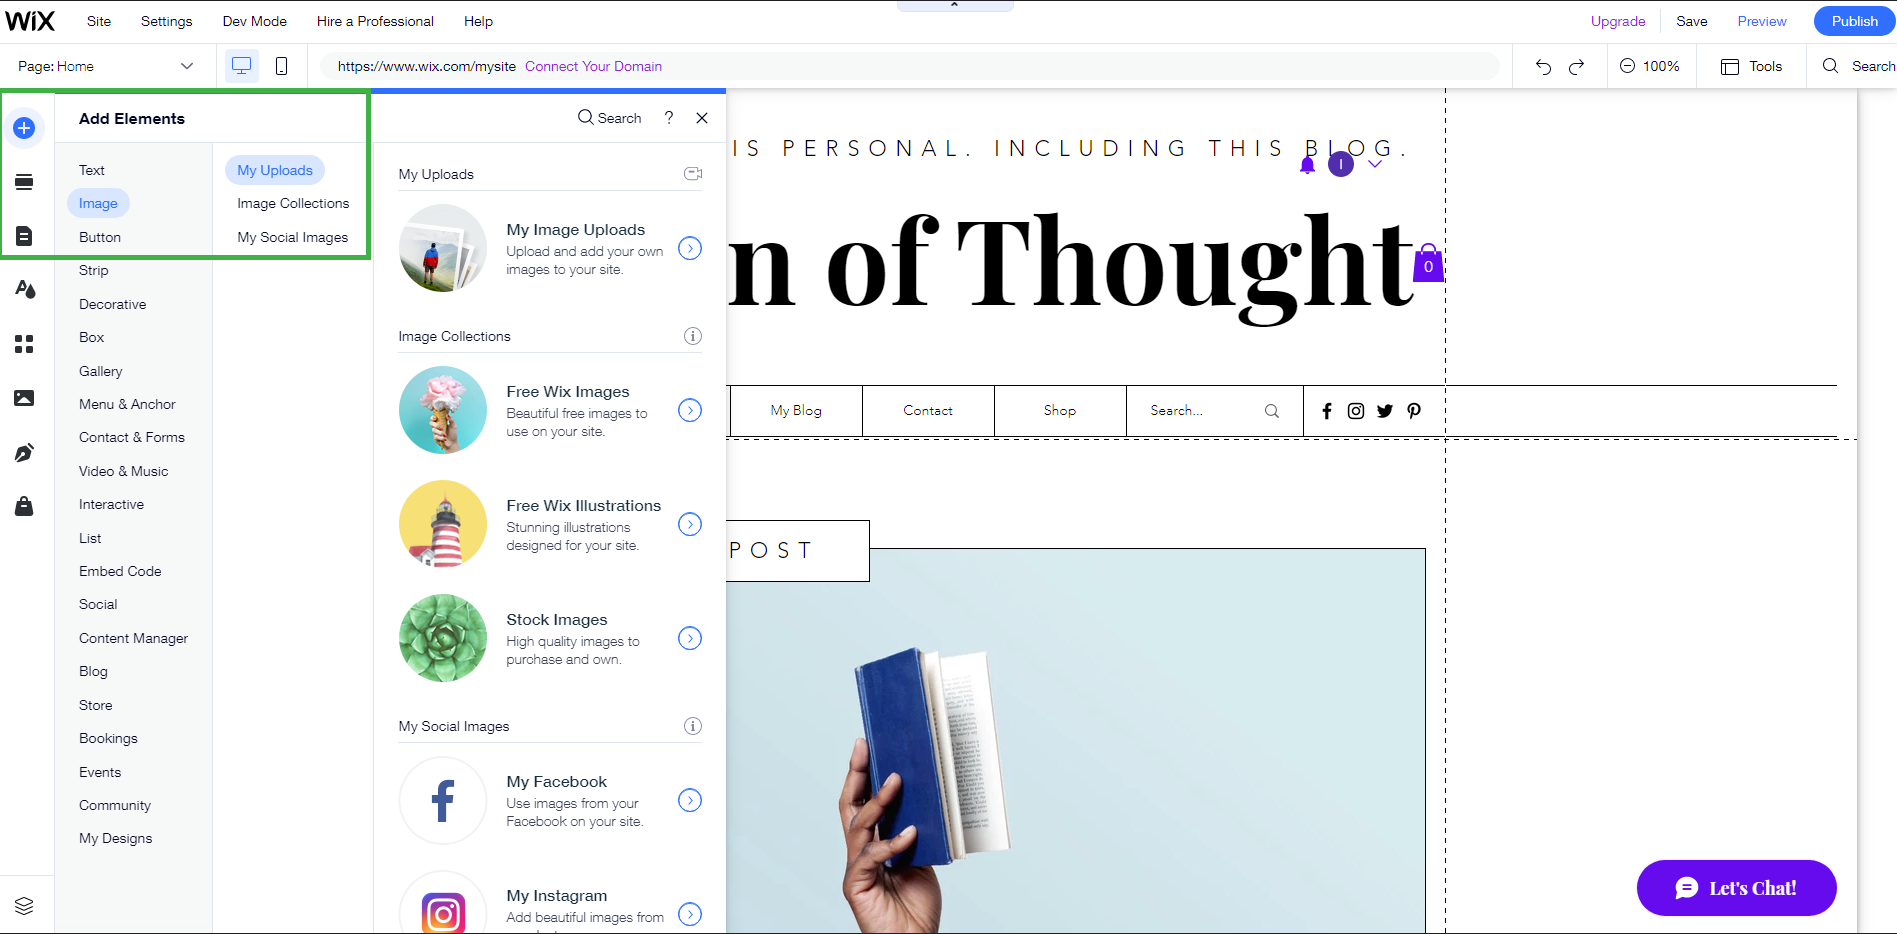
To add a new image to your template:
- Click on the + button on the top of the left navigation bar
- Select the second option, “Image.”
- Choose where you’d like to add the image from
Changing an Image
To change an existing image on a template:
- Click on the image you wish to change, and a blue border should appear, indicating that the image has been selected
- Select “Change image.”
- Locate and select the new image you would like to use
Editing an Image
Wix makes it easy to edit images with just a few clicks. To edit an image to your liking:
- Click on the image you wish to edit
- Select “design” or “filters.”
- Choose the frame or colour filter you’d like to apply to the image
Step 6: Adding Pages
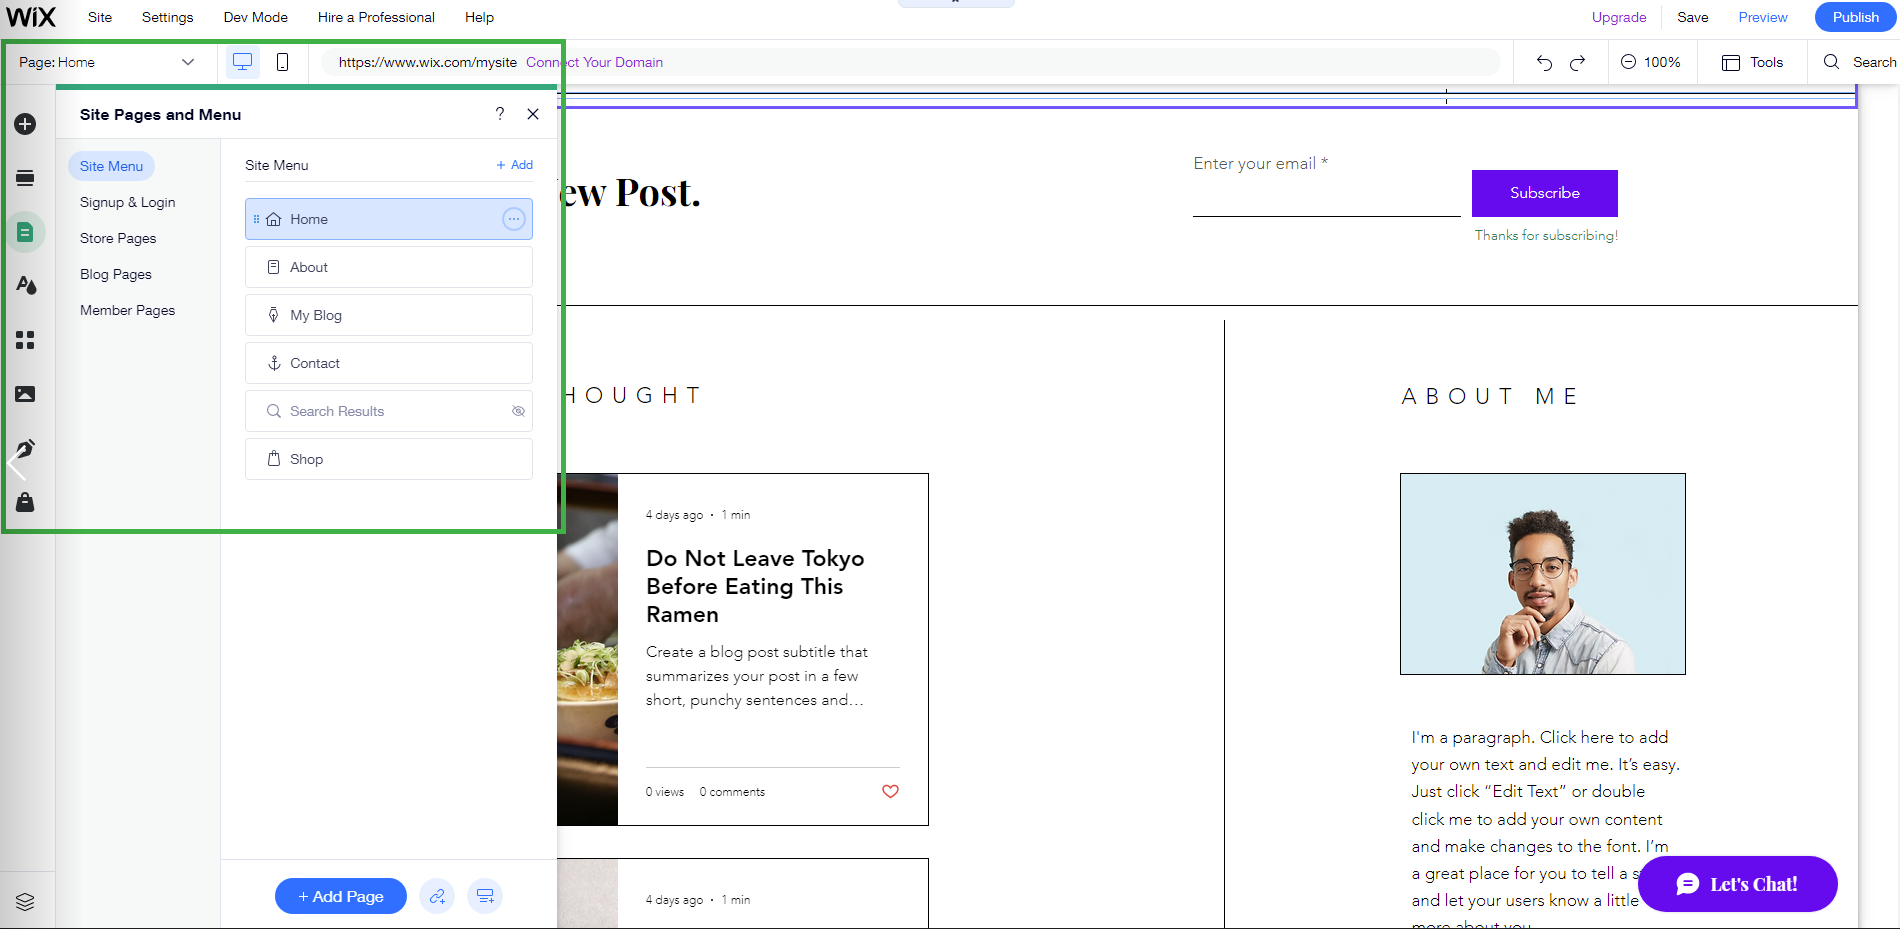
Depending on the type of website you’re setting up, Wix automatically creates a few pages for your website, depending on what it thinks you’ll need. If you find the need to add or even remove specific pages from your website, here’s how you can do so:
- Click on “Site Pages and Menu”, the third button from the top on the left navigation bar
- Click “+ Add” to add a page
- Click on the three dots “…” to delete or hide a page
The “Site Pages and Menu” button gives you an overview of all the pages on your website. It’s an easy way to choose which pages to display, which to hide and even edit a page’s information, layout and SEO settings.
Step 7: Managing Your Online Store
Whether operating a subscription business or operating products, e.g., kids’ beds or digital products, every Wix website has handy features to set up and manage an online e-commerce setup, adding products to setting up shipping, delivery and payment methods; here’s how to handle the essential functions of a Wix online store.
Adding Products
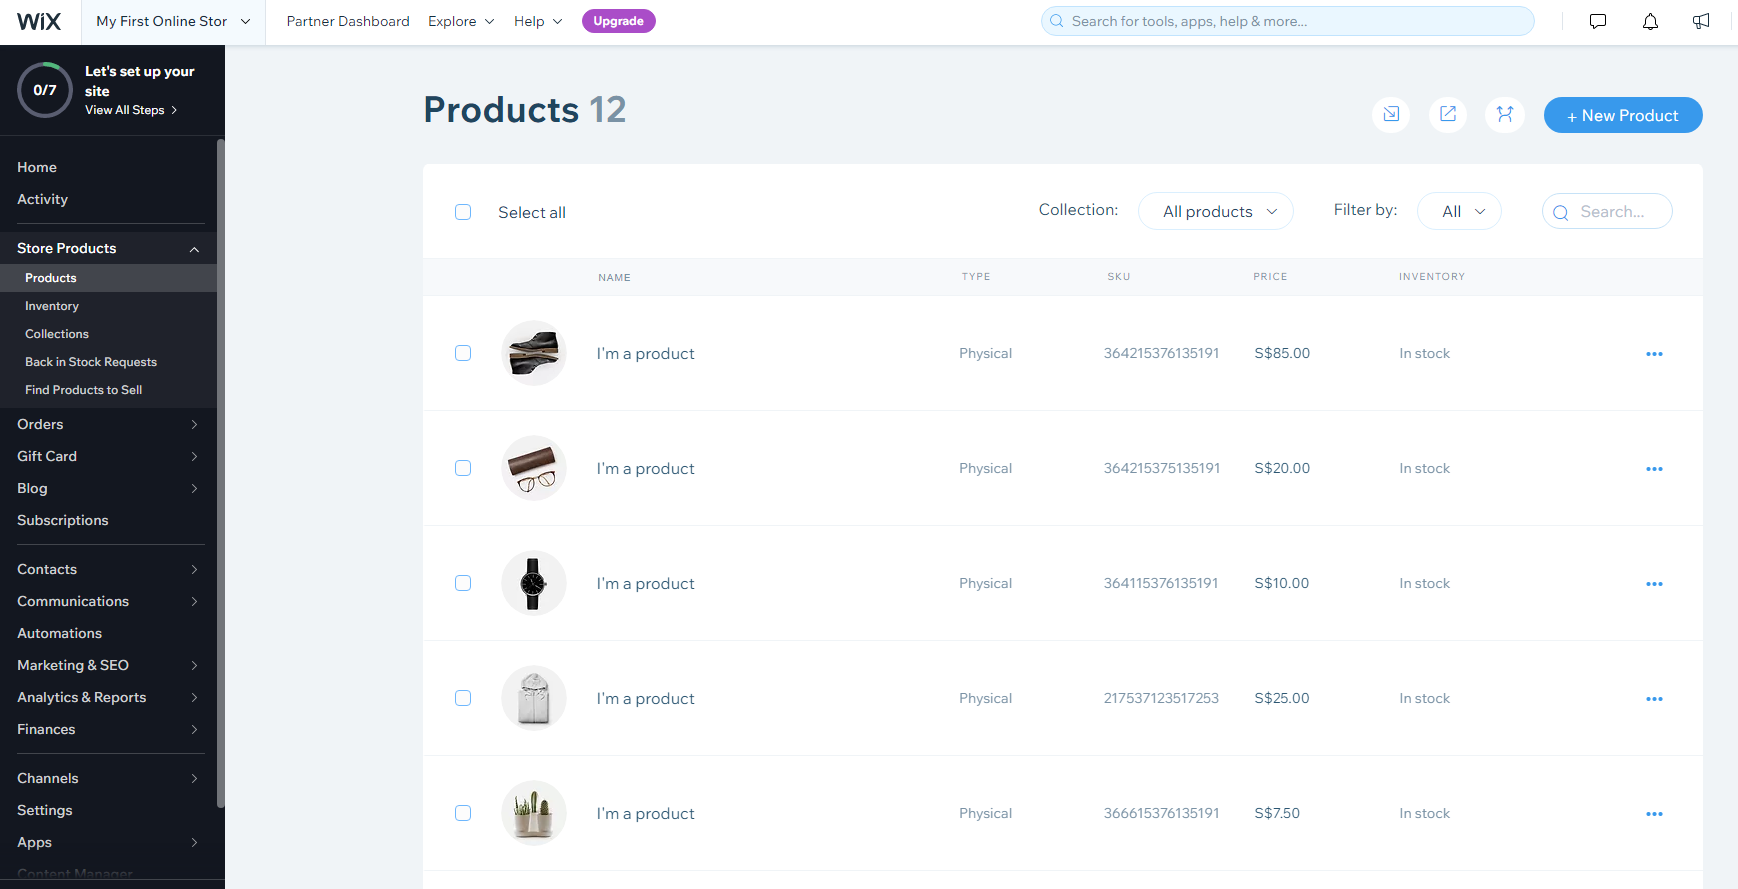
To add a product to your Wix store:
- Navigate to the Wix dashboard
- Click “Store Products” on the left navigation bar
- Click “+ New Product” on the top right of the page
- Select the appropriate option and fill in your product information
Set Up Shipping and Delivery
Once you’ve added physical products to your store, you’ll need a way to ship and deliver them to your customers. Wix has a handy shipping and delivery settings page which contains everything you need to manage how your customers receive your orders.
To get to the “Shipping and Delivery” settings page. Simply:
- Go to the Wix dashboard
- Click on “Settings” third from bottom on the left sidebar
- Click on “Shipping & fulfilment” under the eCommerce & Finance category
The shipping options you can change are split into three categories:
- Domestic
- International
- Third-party fulfilment services
The first two options are relevant if you ship the products and do not rely on a third-party logistics provider. On the “Shipping and Delivery” settings page, you can change how shipping rates are calculated, the estimated delivery time, and choose local pick-up options.
If you use a third-party logistics provider, click “Fulfillment Services” and find the relevant app for your logistics provider in the Wix app market.
Add Payment Modes
Before you get your shop up and running, there must be a way for customers to pay. Wix e-commerce stores can be connected to Stripe and PayPal, which gives you access to various popular payment options.
To add payment modes to your Wix store:
- Go to the Wix dashboard
- Click on “Settings” third from bottom on the left sidebar
- Click on “Accept Payments” under the eCommerce & Finance category
- Connect your relevant payment methods
There is also a manual payment option which you can use to add cash or other offline payment modes, as well as cash on delivery.
Step 8: Add a Domain Name
A domain name is the custom URL your customers will enter into their browser when they want to navigate to your website. That’s why it is essential to pick a domain name that is easy to remember.
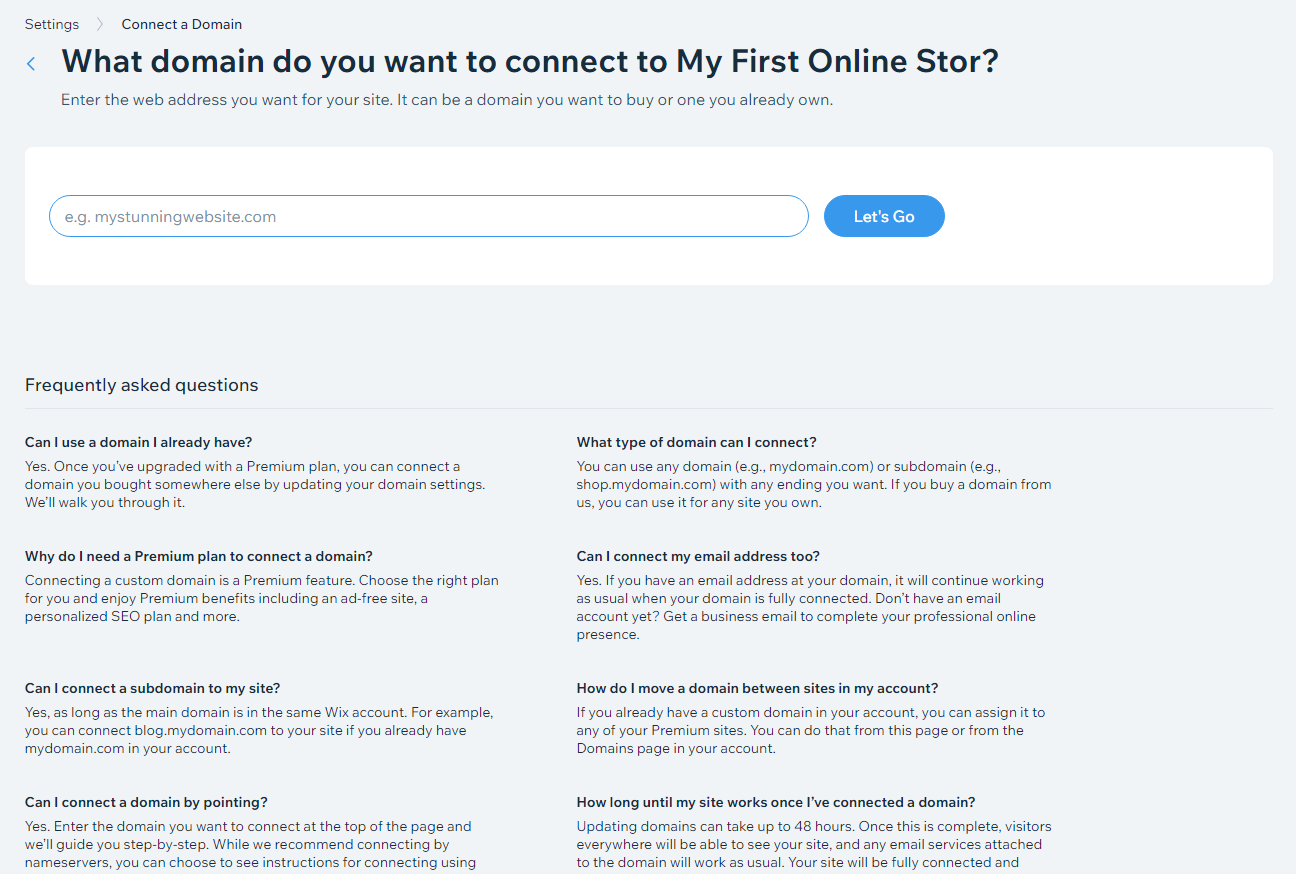
If you are a free user on Wix, your domain name will appear as www.yourstorename.wixsite. If you would like a custom domain name, you will have to subscribe to one of Wix’s premium plans and become a paid user.
Wix allows you to purchase a domain name from them or connect to your domain.
To add a domain name, navigate to settings > connect a domain.
Step 9: Choose Your Wix Subscription Plan
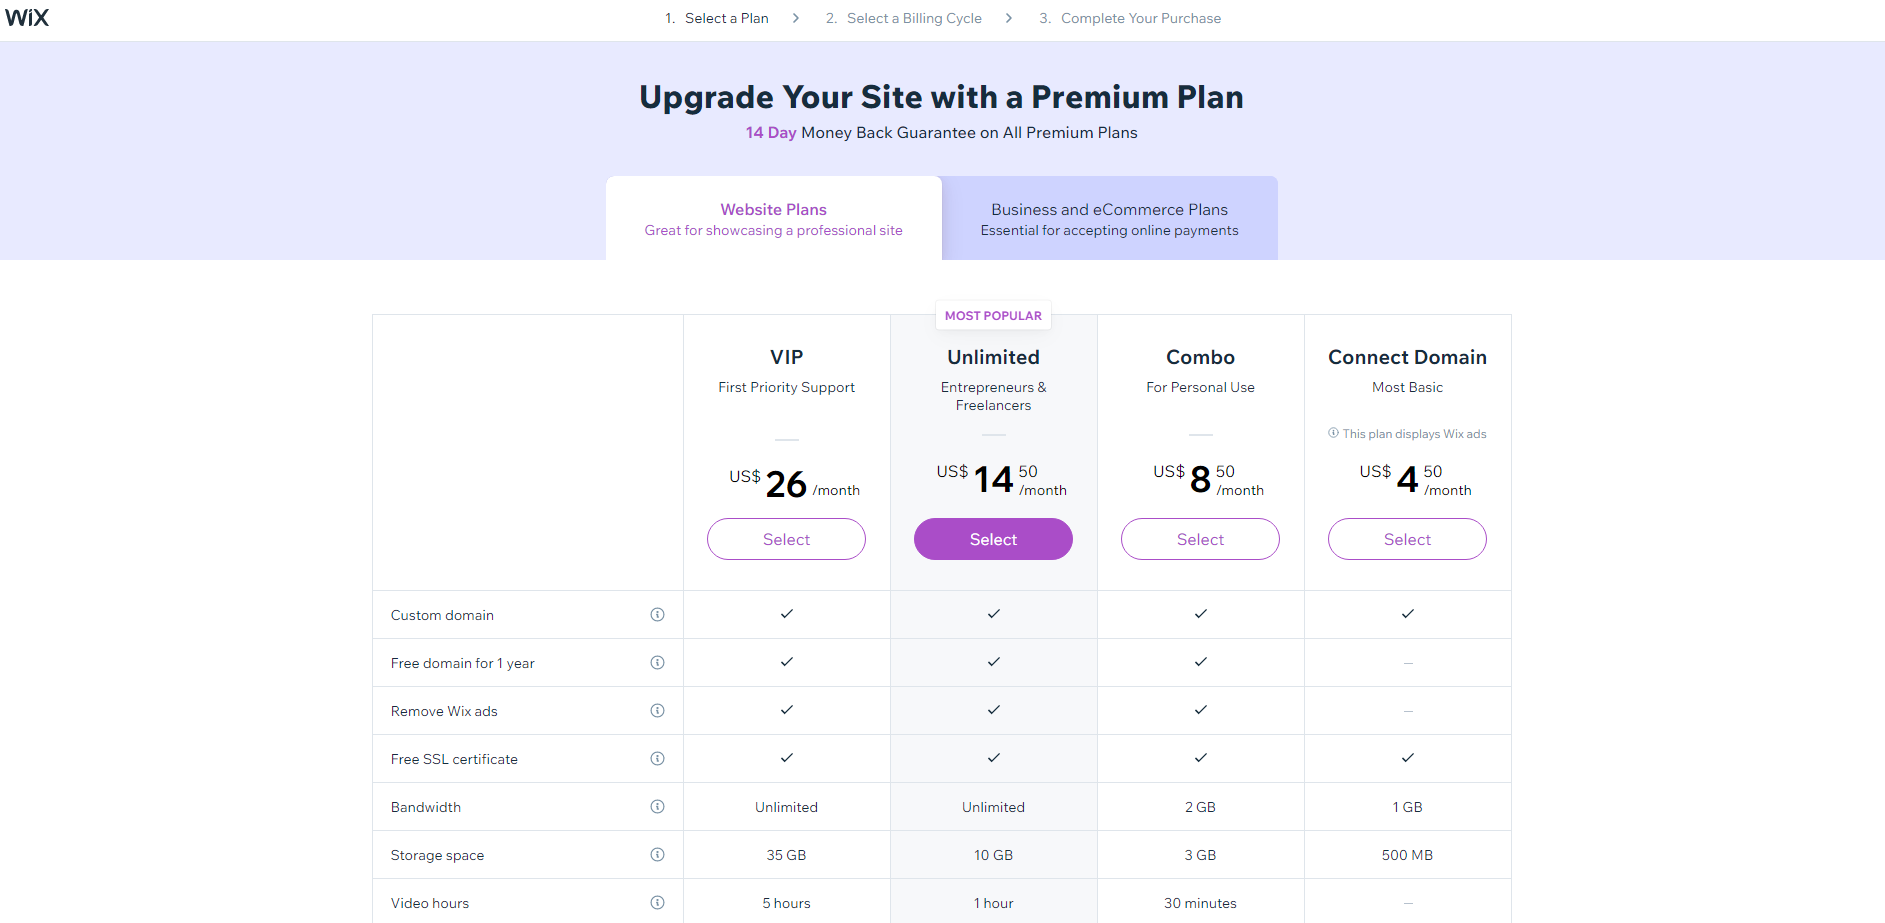
While you can use Wix as a free user, a Wix subscription plan gives you access to advanced features crucial to your website — especially if you’re running a business. Choosing a subscription plan and becoming a paid user allows you to customize your domain name and removes on-site ads, instantly making your website more professional.
To subscribe, click the “Upgrade” button on your Wix dashboard. Wix offers website, business, and e-commerce plans depending on your website needs.
Ad-free website plans range from US$8.50/month to US$26/month, while business plans range from US$17/month to US$35/month.
Step 10: Publish Your Website
You’re ready to publish once you’ve finished and finalized your website’s design!
You “Publish” button on the top right from the website “editor, and your website is life” It’s that easy!
You’ll still be able to change your while iYou’llive. To do so:
- Open your Wix dashboard
- Click on Manage Site
- Click on Edit Site
- Make your changes and click Publish again
Learn How to Setup Your Wix Website from Experts at FirstCom Academy
We hope this step-by-step article on setting up and managing a Wix website has been helpful to you. If you prefer to learn in person rather than read an article, why not sign up for FirstCom Academy’s Wix courses?
FirstCom Academy’s web design is ideal for anyone who wants to learn how to use Wix to set up and run a successful online store. Learn from industry-vetted and ACTA/ACLP-certified trainers who will guide you on using Wix to create your online store that follows industry best practices. And because the course is in person, you can get immediate answers to your questions from an expert with real-world experience.
Learn how to create your website or online store without any code by signing up today for our Wix website creation course or Wix E-commerce course!
Frequently Asked Questions:
How can I move, add, or edit text on my Wix site?
Click on the text box to move it around, or add new text boxes for additional content. Highlight and change existing text as needed.
What's the easiest way to add images to my Wix site?
Simply click the + button > select Image > and choose where to upload your image from - options include computer, free Wix images, social media, or stock libraries.
Can I add or remove pages on my live Wix website?
Yes, using the Site Pages menu you can easily add new pages or delete existing ones from your Wix site at any time.
How do I edit my published Wix website?
Open your Wix dashboard, click Manage Site > Edit Site to access the editor. Make changes then click Publish again for them to go live.
Is there an in-person Wix course I can take in Singapore?
Yes, FirstCom Academy offers beginner and advanced Wix training courses focused specifically on website creation.
Read also: 8 Best Resources For Learning W “x Web” Design.
